
 Whether you’re buying or selling an all-terrain vehicle, an ATV Bill of Sale is crucial to properly document the details of the sale for your local authorities (title transfer and registration through DMV/DNR) as well as your own personal record.
The ATV Bill of Sale is a contract between the buyer and seller which irons out the specifics of the sale. This must include the details of the vehicle, sales price, and mileage/hours. Optionally it may also include condition, waivers, or warranties made by either party.
This is a required document when registering or obtaining a title for your ATV and must be completed at the time of the sale and signed by both parties.
Is a Bill of Sale is Required for ATVs?
A bill of sale serves as the primary proof that a vehicle has changed ownership and is required for all sales. Depending on your state requirements and previous ownership, the ATV may or may not have a title (or Manufacturer’s Certificate of Origin). In these scenarios the bill of sale may be the only proof that the vehicle was sold.
When a title is available, the ATV Bill of Sale is also drafted and signed to fill in the gaps not included in the transfer/assignment section on the back of the title (hours/mile, condition, warranties, etc) which may be required for registration or title transfer.
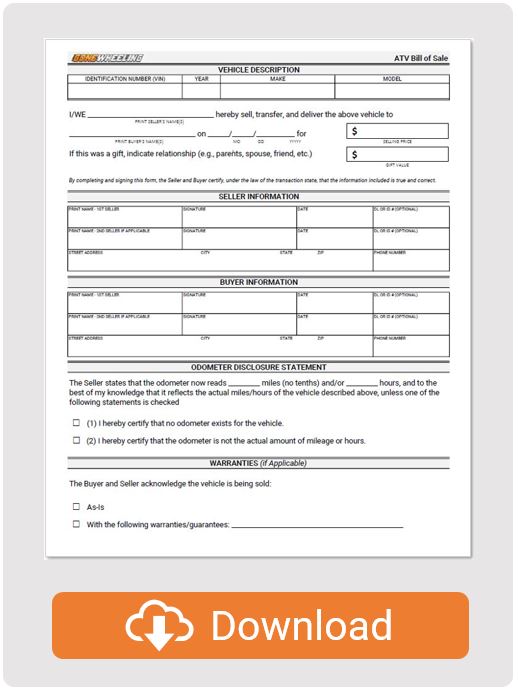
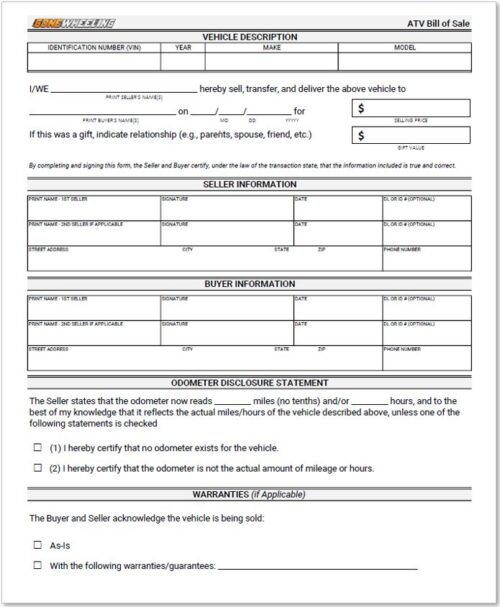
ATV Bill of Sale Template
State Specific Forms
Select your state below to see an ATV Bill of Sale designed specifically for your state.
| Alabama | Montana |
| Alaska | Nebraska |
| Arizona | Nevada |
| Arkansas | New Hampshire |
| California | New Jersey |
| Colorado | New Mexico |
| Connecticut | New York |
| Delaware | North Carolina |
| Florida | North Dakota |
| Georgia | Ohio |
| Hawaii | Oklahoma |
| Idaho | Oregon |
| Illinois | Pennsylvania |
| Indiana | Rhode Island |
| Iowa | South Carolina |
| Kansas | South Dakota |
| Kentucky | Tennessee |
| Louisiana | Texas |
| Maine | Utah |
| Maryland | Vermont |
| Massachusetts | Virginia |
| Michigan | Washington |
| Minnesota | West Virginia |
| Mississippi | Wisconsin |
| Missouri | Wyoming |
What Should be Included in a Bill of Sale?
A bill of sale must include 5 basic pieces of information about the transaction to effectively transfer ownership but can also include many additional items depending on the needs of the parties.
- Buyer and Seller Information (required)
- Vehicle Information (required)
- Sales Price (or Value) (required)
- Buyer and Seller Signatures (required)
- Odometer Disclosure (required)
- Vehicle Condition (optional)
- Seller Warranties (optional)
- Liability Waiver (optional)
- Notarization (optional)
The required items ensure the ATV bill of sale contains the proper elements of a contract and protect both the buyer and seller in the transaction.
How to Use a Bill of Sale
Once a bill of sale has been completed and signed by both parties of the transaction, they each make a copy of the document.
The seller maintains a copy to prove the transfer of ownership. This is particularly important to remove any liability from the seller should the ATV be involved in any property damage, injury following the sale or used in the commission of a crime.
The buyer maintains a copy to prove the legal ownership of the vehicle. In states that allow titling and/or registration, the buyer provides the local authorities with a copy of the document so that proper ownership can be verified before creating a public record.
How to Sell an ATV
- Clean/detail your ATV –A clean ATV will present better in photos, attracting more views, and will allow prospective buyers to easily understand the condition. Start by thoroughly cleaning your ATV with water, automotive soap (dish soap can used for more difficult dirt/grime), a rag and bristle brush. The brush should be used to clean any heavy dirt, and the rag for any general wiping needed. Be sure to address areas like the wheel wells, engine/transmission, underside of the plastics, and frame.
- Take Photos – Most selling platforms will allow you to post 8-12 photos of your ATV and we advise you use all of them. The best lighting for photographs is after dawn when the light isn’t as harsh, reducing reflections off anything metallic. Step back far enough to fit the entire ATV in frame and take photos (4) of front, left, back, and right sides. Take close-up photos of the engine, chain/transmission, brakes, and suspension. If applicable, take photos with the ATV running and lights on. Take a photo of the dash, including the mileage or hours. Lastly, include photos of any damage to the ATV or repairs needed. This will reduce the chance you spend time with an uninterested buyer.
- Create Listing – You have two primary options when selling an ATV. You can list locally through a classified section of a newspaper or magazine, which is a bit dated tactic and won’t have the reach it did 20 years ago. Alternatively, you can list online through one of many selling platforms (eBay, Craigslist, Facebook Marketplace) which drive significantly more traffic to your ATV. Your listing should include the photos taken, a description of the ATV and its condition, and your asking price. It’s important to be honest in your description as you don’t want to waste your time, or that of the prospective buyer, when they inspect an ATV in a different condition that described.
- Meet with Prospective Buyers – Ideally, you should meet with buyers away from your home. This is the safest approach, albeit difficult to do with a 400-600 lb vehicle. If you meet with buyers at your home, be sure to have other residents or a neighbor available to witness the meeting. Have some gas in the tank so the buyer can test drive the ATV and be prepared to walk them through any issues with the ATV.
- Negotiate the Sale Price – It’s common place these days to negotiate a large private party sale like an ATV, so don’t be surprised if you get an offer less than your listing price. Be prepared to negotiate based on what you think is a fair value for the vehicle and use resources like other listings (active and sold) or KBB.com to help validate your pricing.
- Complete the ATV Bill of Sale – Once you have an agreement on the price, it’s time to complete the ATV Bill of Sale. Use the section below to walk you through the process.
- Finalize the Transfer – Depending on the state in which you live, the ATV may or may not have a title. If it does, the seller and buyer will need to sign the “Assignment” or “Transfer” section on the back of the document. This will allow the buyer to properly transfer the title in their name. If registration exists on the vehicle, there is no need to provide that to the buyer. They will need to contact their local authority (DMV/DNR) to register the vehicle in their name. The bill of sale is all they will need to prove ownership to the authorities in order to process the new registration.
How to Complete the Bill of Sale
A bill of sale is only effective when filled out correctly by each party. Mislabeled or missing information can lead to headache for the buyer, seller, and your managing state departments (DMV, DNR, etc.). Read our instructions below.
Step 1: Complete the Vehicle Description

- Identification Number (VIN) – Each ATV has an associated identification number or VIN which is unique to that vehicle. This number is documented on the title, manufacturer’s statement of origin, or sometimes on current registration. The VIN is also etched into the ATV frame and is normally located on the lower frame rails below the engine.
- Year/Make/Model – The vehicle specifics are required to appropriately transfer ownership, and at a minimum include the Year or manufacture, as well as the Make and Model of the ATV.
Step 2: Fill out the Details of the Sale
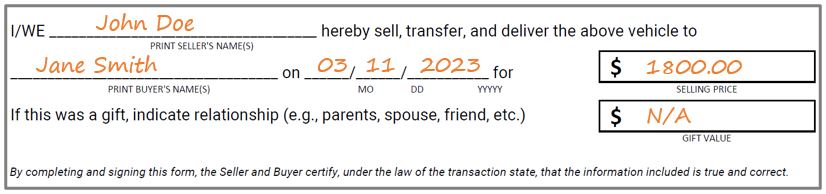
- Seller Name – Fill in the seller’s legal name as shown on their identification.
- Buyer Name – Fill in the buyer’s legal name as shown on their identification.
- Date – Document the transaction date.
- Selling Price – Document the final sales price, excluding fees collected.
- Gift Value (if applicable) – Add a gift value if the ATV is being transferred without an exchange of money.
Step 3: Add Seller Information
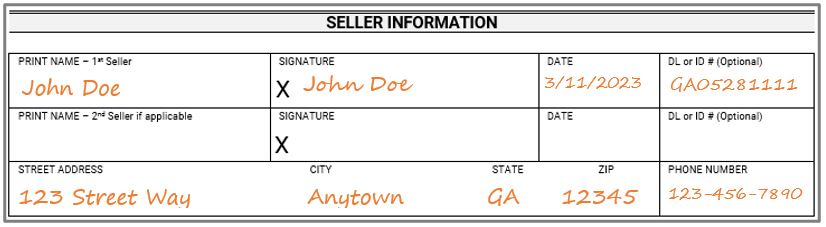
- Print/Sign Seller Name – Fill in the seller’s legal name and sign with date.
- Street Address/Phone Number – Fill in seller’s address as shown on their ID and valid phone number.
Step 4: Add Buyer Information
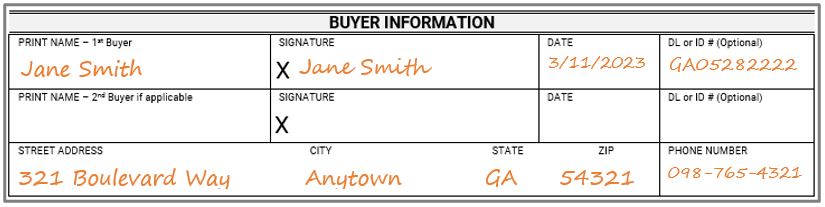
- Print/Sign Buyer Name – Fill in the buyer’s legal name and sign with date.
- Street Address/Phone Number – Fill in buyer’s address as shown on their ID and valid phone number.
Step 5: Odometer Disclosure
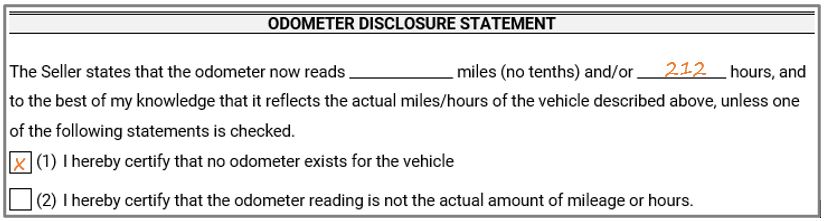
- Odometer Disclosure – Seller inputs miles and/or hours. If the ATV doesn’t have an odometer, the seller checks the first box. If the odometer is an inaccurate reflection of actual miles/hours on the ATV, the seller checks the second box.
Step 6: Document Warranties (if applicable)
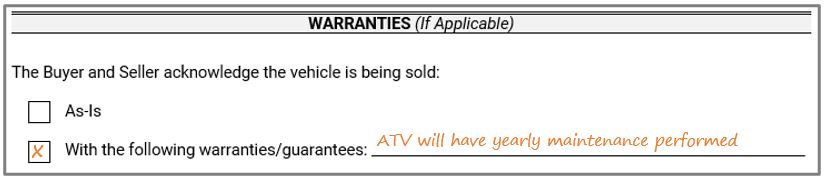
- Check Box – Mark whether the ATV is being sold with any warranties or guarantees from the seller.